Nutter Butter cookies are an irresistible treat loved for their creamy peanut butter flavor and delightful texture. These iconic cookies have a unique combination of crispy and chewy layers, making them perfect for both everyday snacking and special occasions. In this guide, we’ll explore how to make homemade Nutter Butter cookies, their history, variations, and tips to ensure perfect results every time.
Ingredients for Nutter Butter Cookies
Key Ingredients and Their Role
To recreate the iconic taste of this beloved treat, you’ll need the following essential ingredients:
- Peanut Butter: The star ingredient! Creamy peanut butter works best for a smooth filling, but crunchy peanut butter can add texture.
- Flour: All-purpose flour provides the structure for the cookie dough.
- Butter: Adds richness and helps achieve the perfect cookie texture.
- Sugar: A combination of granulated sugar and brown sugar enhances sweetness and adds a hint of molasses flavor.
- Egg: Acts as a binder, giving the cookies structure and softness.
- Vanilla Extract: Adds depth of flavor, enhancing the overall cookie taste.
- Baking Soda: Provides the necessary leavening for a light and slightly crisp texture.
- Salt: Balances the sweetness and enhances the nutty flavor.
Substitutions and Variations
- Almond Butter: Substitute peanut butter with almond butter for a unique flavor twist.
- Gluten-Free Option: Use a gluten-free all-purpose flour blend for a gluten-free version.
- Vegan Option: Replace butter with vegan butter and eggs with a flaxseed egg substitute.
Step-by-Step Guide to Making Nutter Butter Cookies
Preparing the Dough
- Creaming Butter and Sugars:
In a large bowl, cream together the butter, peanut butter, granulated sugar, and brown sugar until light and fluffy. This step ensures the cookies are rich and flavorful. - Adding Wet Ingredients:
Mix in the egg and vanilla extract, beating until well combined. - Incorporating Dry Ingredients:
In a separate bowl, whisk together the flour, baking soda, and salt. Gradually add the dry ingredients to the wet mixture, mixing until a soft dough forms.
Shaping the Cookies
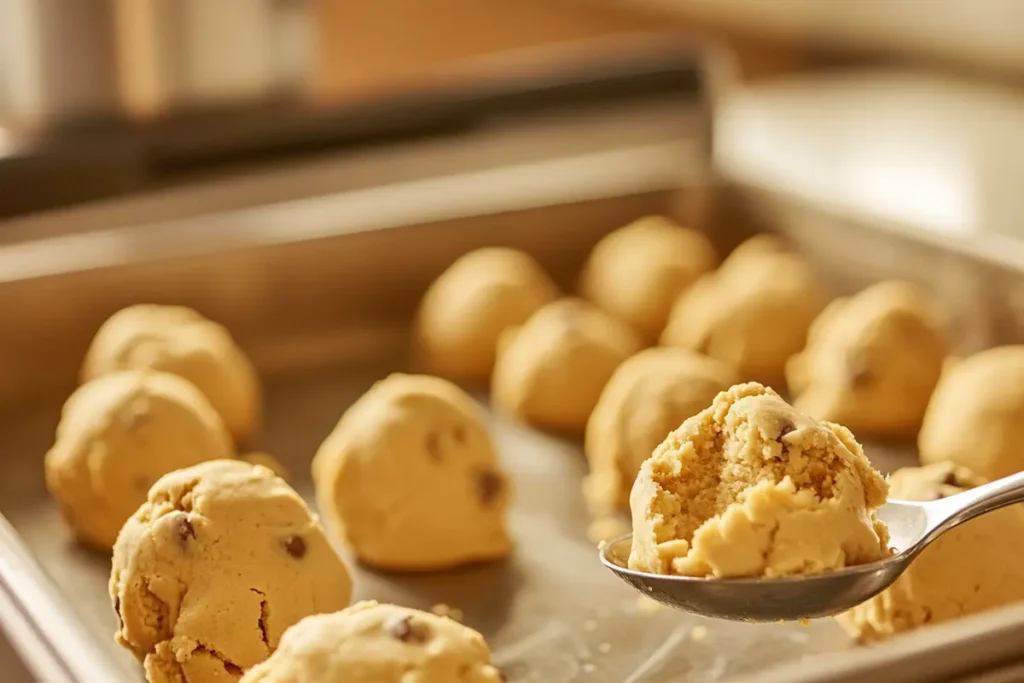
- Forming the Dough Balls:
Scoop out small portions of dough (about 1 tablespoon each) and roll them into balls. - Creating the Signature Design:
Flatten each ball slightly with a fork, creating the classic crisscross pattern on top.
Baking the Cookies
- Preheating the Oven:
Preheat your oven to 350°F (175°C) and line a baking sheet with parchment paper. - Baking:
Place the cookies on the baking sheet, spacing them about 2 inches apart. Bake for 10-12 minutes, or until the edges are golden brown. Let the cookies cool on the baking sheet for 5 minutes before transferring them to a wire rack to cool completely.
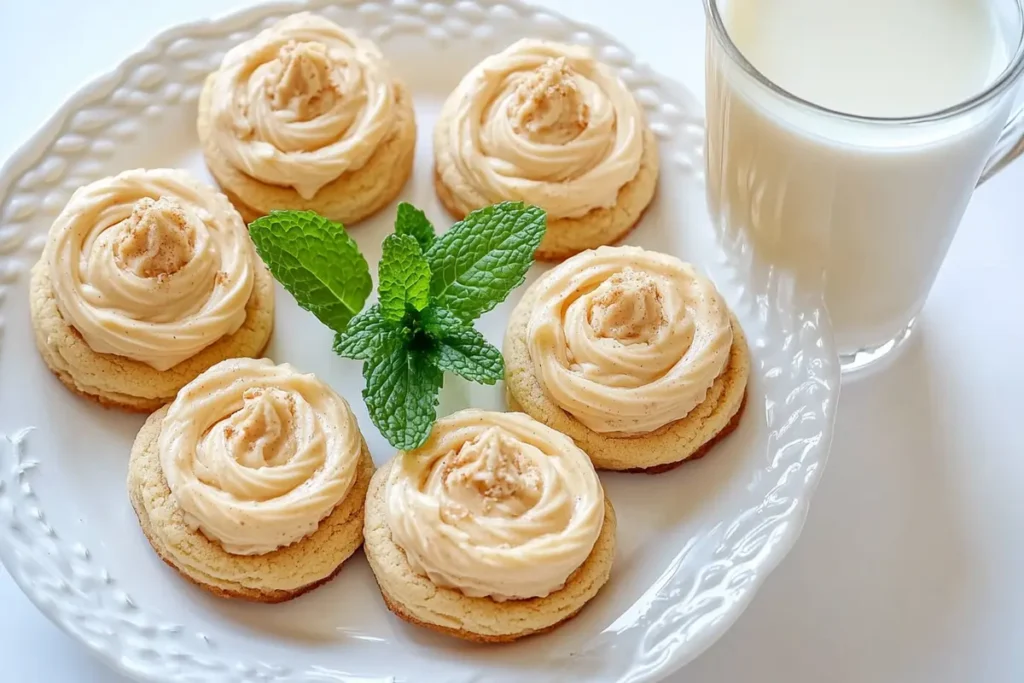
Making the Peanut Butter Filling
The creamy peanut butter filling is what sets Nutter Butter cookies apart. Here’s how to make it:
Ingredients for the Filling:
- 1/2 cup creamy peanut butter
- 1/4 cup unsalted butter (softened)
- 1 cup powdered sugar
- 1 teaspoon vanilla extract
Instructions:
- Beat the peanut butter and butter together until smooth and creamy.
- Gradually add the powdered sugar, mixing until the filling is thick and fluffy.
- Stir in the vanilla extract for added flavor.
Assembling the Cookies:
- Spread a generous dollop of the filling on the flat side of one cookie.
- Top with another cookie, pressing gently to create a sandwich.
Tips for the Perfect Nutter Butter Cookies
- Measure Ingredients Precisely:
Baking is a science, so accurate measurements ensure the best results. - Chill the Dough:
Chilling the dough for 20-30 minutes before baking helps prevent the cookies from spreading too much. - Use Room Temperature Ingredients:
Ensure your butter and egg are at room temperature for easier mixing and better texture. - Don’t Overbake:
It should be golden around the edges but soft in the center. They’ll firm up as they cool.
Nutter Butter Cookies Variations
Chocolate-Dipped Nutter Butter Cookies
Melt semi-sweet or dark chocolate and dip half of each assembled cookie into it. Place on parchment paper until the chocolate sets.
Nut-Free Nutter Butter Cookies
Replace peanut butter with sunflower seed butter for a nut-free alternative.
Mini Nutter Butter Cookies
Make smaller dough balls to create bite-sized versions of this classic treat.
Spiced Peanut Butter Cookies
Add a teaspoon of cinnamon or a pinch of nutmeg to the dough for a warm, spiced twist.
Pairing Suggestions for Nutter Butter Cookies
- Beverages:
Enjoy these treats with a glass of cold milk, a cup of hot cocoa, or your favorite coffee for a perfectly indulgent experience. - Ice Cream Sandwiches:
Use these cookies as a base for homemade ice cream sandwiches. Vanilla or chocolate ice cream makes an excellent pairing.
Nutritional Information
Per Serving (1 Cookie Sandwich):
- Calories: ~200
- Protein: 5g
- Carbohydrates: 18g
- Fat: 12g
- Sugar: 10g
The History of Nutter Butter Cookies
Nutter Butter cookies were introduced by Nabisco in 1969 and quickly became a household favorite. Their signature peanut shape and creamy filling made them stand out in the cookie aisle. Over the years, they’ve inspired countless recipes, from cookie crusts to ice cream flavors.
Frequently Asked Questions
Can I Make Nutter Butter Cookies Ahead of Time?
Yes! Store unfilled cookies in an airtight container for up to 5 days. Assemble them with the filling when ready to serve.
How Do I Store Nutter Butter Cookies?
Store assembled cookies in an airtight container at room temperature for up to 3 days or in the refrigerator for up to a week.
Can I Freeze Nutter Butter Cookies?
Absolutely! Freeze unassembled cookies and filling separately. Thaw and assemble when needed.
Can I Make Gluten-Free Nutter Butter Cookies?
Yes, substitute all-purpose flour with a gluten-free flour blend.
What’s the Best Way to Achieve the Classic Nutter Butter Shape?
Use a cookie cutter in the shape of a peanut or mold the dough by hand for an authentic look.
Conclusion
Making your own Nutter Butter cookies is a delightful and satisfying baking experience that yields incredibly tasty results. With just a handful of simple ingredients and straightforward steps, you can recreate these iconic treats right at home. Whether you prefer the classic version or want to explore creative twists, this recipe is guaranteed to bring happiness to everyone who tries it. Enjoy the process and savor every bite!